![]()
Add Color Blocks to Text

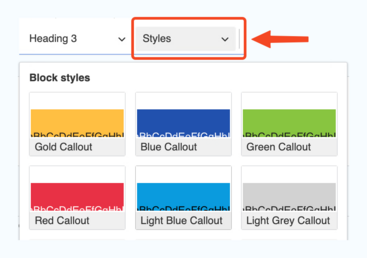
Choose any text on your page or block and place a colored block behind it.
Select the text and choose the color you want from the Styles dropdown menu in the WYSIWYG toolbar.
![]()
Add Font Colors
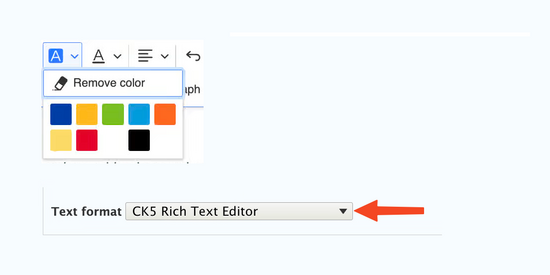
CK5 Rich Text Editor
The CK5 Rich Text Editor has font color and background color options based on the UCR theme colors.

![]()
Add the Ray of Light Element
Download the image here, and upload it to your site. This small image is part of UCR branding. You can also download UCR's Campus Brand Toolkit if you want logos and fonts.
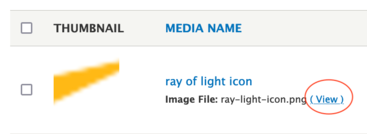
After you upload the image, it will appear at the top of your Media Library. Click on (View) to open it, and select everything after your root URL. Copy it to your clipboard. The portion you want to copy will always begin with /sites/. For example, its URL on this website is https://cnastheme.ucr.edu/sites/g/files/rcwecm3916/files/ray-light-icon.png. The part to be copied is only /sites/g/files/rcwecm3916/files/ray-light-icon.png. Your path to the image you upload will be similar but not the same. Do not use the example URLs on this page, they will not work for your site.

Work in the source code of your page. Add the following line of code in the source code (the code in bold red) with the words you want the image to appear on top of:
<p><img alt="" src="" /><br />The image will appear directly above these words.</p>
Paste the portion of the image URL that you copied in between the double quotes after src=
<p><img alt="" src="/sites/g/files/rcwecm3916/files/ray-light-icon.png" /></p>

The image will appear above these words just like you can see here!
NOTE: If you want more spacing between the image and your text, add the following line of code in the source code (the code in bold red) above the words you want the image to appear on top of:
<p><img alt="" src="" /></p>
<p>The image will appear above these words</p>
![]()
The image will appear above these words just like you can see here!
CENTERED: If you would like your text and the image centered above your text, use the following code instead:
<p style="text-align:center"><img alt="" src="" /><br />The image will appear above these words.</p>

The image will appear above these words just like you can see here!
![]()
Add Color Gradients to Your Layout

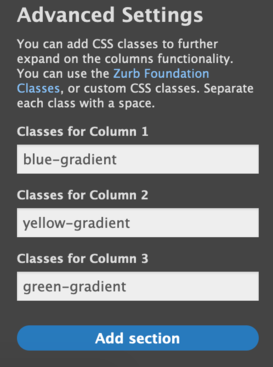
In Layout Mode, click on a section and choose configure. At the bottom of the black panel that opens, you'll see a Classes box for each column in the section. You can add blue, yellow, or green gradients. The result will look like the example below. If you are using a layout with more than one column and using gradients, you will also want to use the equalheights class. Learn about the different classes

